When your projector isn’t working as expected, it can be incredibly frustrating, especially if you rely on it for important presentations, classroom activities, or home entertainment. Troubleshooting projector issues can seem daunting, but with the right guidance, many problems can be resolved quickly and easily. In this comprehensive guide, we’ll walk you through the most common projector issues, explain how to troubleshoot them and offer tips to ensure your projector stays in top condition.
Table of Contents
Why Is My Projector Not Displaying?
One of the most common problems users face is a projector that simply won’t display an image. There are several potential causes for this, and by systematically troubleshooting projector issues, you can usually identify and fix the problem.
Check the Power Supply
First things first, ensure that the projector is properly powered. It might sound obvious, but sometimes the simplest solutions are the most overlooked in troubleshooting projector problems.
Ensure the Projector Is Plugged In
Double-check that the power cable is securely plugged into the projector as well as the power outlet. If the projector is connected to a power strip, ensure that the strip is turned on.
- Test the Power Outlet: If the projector isn’t powering on, try plugging it into a different outlet to rule out any issues with the power source. You might also want to test the outlet with another device to ensure it’s working.
Inspect the Connection Cables
If your projector is on but not displaying an image, the next step in troubleshooting projector issues is to check the connection cables.
- Verify Cable Connections: Ensure that all cables, whether HDMI, VGA, or other types, are securely connected to both the projector and the source device (like a laptop or DVD player). Even a slightly loose connection can prevent the projector from displaying an image.
- Test Different Cables: If you suspect a faulty cable, try using a different one. Cables can wear out over time, causing connectivity issues.
- Check the Ports: Inspect the projector’s input ports for any visible damage or debris. If a port seems damaged, it might need professional repair.
Source Selection
Projectors often have multiple input sources, and if the wrong source is selected, the projector won’t display an image.
- Select the Correct Input Source: Use the projector’s remote control or onboard buttons to navigate to the correct input source (e.g., HDMI 1, HDMI 2, VGA). If you’re unsure, try switching between sources to see if the image appears on one of them.
- Ensure the Source Device Is On: Make sure the device you’re projecting from (like a laptop) is turned on and actively sending a signal. For laptops, you may need to press a key combination (usually “Fn” + a function key) to toggle the display output.
Lamp Issues
A projector’s lamp is a critical component, and if it’s not functioning, the projector won’t display an image.
- Check the Lamp Indicator: Most projectors have an indicator light that shows the status of the lamp. If the lamp is nearing the end of its life, this light may turn on or blink. Consult your projector’s manual for the specific meanings of the indicator lights.
- Replace the Lamp: If the lamp has burned out, it will need to be replaced. Projector lamps typically last between 2,000 to 5,000 hours, depending on the model. Replacing the lamp is a common step in troubleshooting projector issues related to display.
Overheating
Overheating can cause a projector to shut down to prevent damage, resulting in no display.
- Ensure Proper Ventilation: Check that the projector is not obstructed and has adequate airflow. Avoid placing it in enclosed spaces or near heat-emitting objects.
- Clean the Air Filter: Projectors often have air filters that prevent dust from entering the internal components. Over time, these filters can become clogged, leading to overheating. Regularly clean or replace the air filter as recommended by the manufacturer to avoid troubleshooting projector overheating issues.
How to Fix a Blurry Projector Image
A blurry image can ruin your viewing experience, whether you’re giving a presentation or watching a movie. Fortunately, this issue is often easy to fix with a few troubleshooting projector tips.
Adjust the Focus
The first and most straightforward solution is to adjust the focus of the projector.
- Locate the Focus Ring: Most projectors have a focus ring near the lens that you can turn to sharpen the image. Slowly adjust the ring until the image is clear.
- Fine-Tuning: If your projector has additional focus settings in the menu, use them for fine-tuning. Some projectors also offer digital focus adjustment options.
Check the Lens
The lens is the gateway for the light that creates the image, and if it’s dirty, the image will be blurry.
- Clean the Lens: Turn off the projector and allow it to cool down. Use a microfiber cloth to gently clean the lens, removing any dust, fingerprints, or smudges. Harsh chemicals should not be used since they can harm the lens coating.
Distance and Placement
The distance between the projector and the screen plays a significant role in image clarity.
- Optimal Distance: Refer to your projector’s manual to find the recommended distance from the screen based on the screen size. Placing the projector too close or too far can result in a blurry image.
- Proper Alignment: Ensure that the projector is aligned with the center of the screen and that it is not tilted. Keystone correction features can help adjust the image if the projector is placed at an angle.
Resolution Settings
The resolution of the source device and the projector should match for the best image quality.
- Set the Correct Resolution: Access the display settings on your laptop, computer, or other source devices and set the resolution to match the projector’s native resolution. For example, if your projector has a native resolution of 1080p, set the source device to output at 1080p. Adjusting resolution settings is a crucial step in troubleshooting projector image clarity issues.
Read More: Top 9 Projector Set Up Tips 2024: Flawless Viewing
What to Do When Your Projector Has No Sound
A projector with no sound can be just as frustrating as one with no image. Here’s how to troubleshoot projector sound issues.
Check the Volume
The first step is to check the volume settings on both the projector and the source device.
- Projector Volume: Ensure that the projector’s volume is turned up and not muted. Some projectors have volume control buttons on the remote or the device itself.
- Source Device Volume: Check the volume settings on your laptop, DVD player, or other devices connected to the projector. If you’re using a laptop, ensure that it’s not muted and that the volume is turned up.
Audio Cables
If you’re using external speakers or a wired connection, the issue might be with the audio cables.
- Verify Cable Connections: Ensure that the audio cables are securely connected to both the projector and the speakers. If you’re using a separate audio output, like a 3.5mm jack or RCA cables, double-check these connections.
- Test Different Cables: If the cables are old or damaged, try using a new set to see if the sound improves.
External Speakers
If you’re relying on external speakers, there could be a few additional troubleshooting projector steps.
- Connect External Speakers: Ensure that the external speakers are properly connected to the projector. Some projectors might require you to select the external speaker output manually in the settings menu.
- Bluetooth Connection: If you’re using Bluetooth speakers, make sure they’re properly paired with the projector. Check the Bluetooth settings on both the projector and the speakers.
Source Device Settings
Sometimes, the issue might stem from the source device rather than the projector itself.
- Audio Output Settings: On your laptop or other source devices, check the audio output settings. Ensure that the audio is set to output through the correct device (e.g., HDMI or headphone jack).
- Test With Another Source: If possible, try connecting a different device to the projector to see if the sound issue persists. This can help determine whether the problem is with the projector or the source device.
How to Fix a Projector That Isn’t Turning On
When your projector won’t turn on, it’s often due to a power-related issue. Here’s how to troubleshoot projector power issues.
Power Source Issues
Before expecting the worst, start with the basics.
- Check the Power Outlet: Ensure that the power outlet is functional by testing it with another device, like a lamp or phone charger.
- Try a Different Outlet: If the outlet seems to be the problem, try plugging the projector into a different outlet. If you’re using a surge protector, ensure that it’s turned on and functioning properly.
Check the Power Button
Sometimes, the issue can be as simple as a malfunctioning power button.
- Ensure the Button Is Working: Press the power button firmly and ensure it’s not stuck. If the button feels unresponsive, it might be a hardware issue that requires professional repair.
- Use the Remote: If the projector has a remote control, try turning it on using the remote instead of the physical button.
Internal Overheating
If the projector was used for an extended period before shutting down, overheating might be the culprit.
- Cool Down Period: Allow the projector to cool down for at least 1530 minutes before trying to power it back on. Most projectors have safety features that prevent them from turning on if they’re too hot.
- Check Ventilation: Ensure that the projector is in a well-ventilated area and that the air vents are not blocked by dust or other obstructions.
Fuse and Internal Components
In some cases, a blown fuse or other internal component issue might be preventing the projector from turning on.
- Check the Fuse: Some projectors have an accessible fuse that can be checked and replaced if necessary. Consult your projector’s manual for instructions on how to locate and replace the fuse.
- Professional Repair: If you suspect a more serious internal issue, such as a malfunctioning power supply, it’s best to contact a professional repair service. Attempting to repair internal components yourself can be risky and may void your warranty.
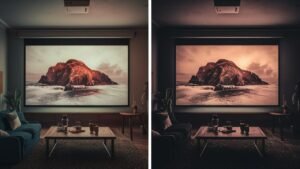
Fixing Projector Image Discoloration
Image discoloration is another common issue that can significantly impact the viewing experience. Here’s how to troubleshoot projector image discoloration.
Lamp Issues
The projector lamp is often the cause of image discoloration, especially as it ages.
- Check Lamp Life: If your projector has a lamp life indicator, check how many hours the lamp has been used. Discoloration can occur when the lamp is nearing the end of its life.
- Replace the Lamp: If the lamp is old or showing signs of wear, replacing it may resolve the discoloration. Follow the manufacturer’s instructions for replacing the lamp.
Cable and Connection Issues
Sometimes, image discoloration can be caused by issues with the cables or connections.
- Inspect HDMI/VGA Cables: Check the cables for any signs of damage, such as frayed wires or bent pins. Damaged cables can cause color distortion in the projected image.
- Try a Different Cable: If you suspect a cable issue, try connecting the projector with a different cable to see if the discoloration persists.
Projector Settings
Incorrect settings can also cause discoloration in the image.
- Calibrate Color Settings: Access the projector’s menu and navigate to the color settings. Adjust the brightness, contrast, and color balance until the image looks correct. Some projectors have preset modes (e.g., “Cinema,” “Presentation”) that you can use as a starting point.
- Factory Reset: If you’ve made extensive changes to the settings and can’t seem to fix the issue, consider performing a factory reset to restore the original settings. Be sure to back up any custom settings you may want to keep.
Clean the Lens
As with blurry images, a dirty lens can also cause discoloration.
- Lens Cleaning: Turn off the projector and allow it to cool before cleaning the lens. Dust or smudges can be delicately removed with a soft, lint-free cloth. Refrain from using anything abrasive that might scratch the lens.
Conclusion
Troubleshooting projector issues doesn’t have to be a headache. By following the steps outlined in this guide, you can diagnose and fix the most common projector problems on your own, saving time and potentially avoiding costly repairs. Whether your projector isn’t displaying an image, producing any sound, or showing a blurry or dis-coloured picture, this guide has you covered. Remember to perform regular maintenance, such as cleaning the lens and air filters, to keep your projector running smoothly for years to come.
FAQs
Q1: How often should I replace the projector lamp?
Projector lamps typically last between 2,000 to 5,000 hours. It’s recommended to replace the lamp when you notice a significant drop in brightness or after reaching the manufacturer’s suggested lamp life.
Q2: Why does my projector keep overheating?
Overheating may be caused by blocked air vents, a dirty filter, or operating the projector in a hot environment. Ensure that the projector has proper ventilation and clean the air filters regularly to prevent overheating.
Q3: Can I connect my projector to Bluetooth speakers?
Yes, if your projector supports Bluetooth connectivity. Consult the projector’s manual for specific instructions on pairing Bluetooth speakers with the projector. Make sure the speakers are in pairing mode and close to the projector for a stable connection.
Q4: What should I do if the projector image is upside down?
An upside-down image typically occurs when the projector is mounted on the ceiling. You can correct this by accessing the projector’s menu and selecting the appropriate orientation setting, often labelled as “Ceiling Mount” or “Image Flip.”
Q5: Is it safe to use a universal remote with my projector?
Yes, a universal remote can be used with your projector as long as it is compatible with the projector’s model. Refer to the remote’s manual for programming instructions and ensure it supports the necessary functions for your projector.